Saturday, April 26, 2014

Manipulating Onyx Presets


I've been messing around with ONYX to make my trees for my Spirited Away scene but just got frustrated with how they were turning out. I think this is because I was just exporting the default trees and plopping them in. So I decided to make a tree library scene that had real-world accurate trees (to an extent).

For example, I wanted to use the Platanus tree from the ONYX preset library.

I took a quick google and found some good references of the kind of Platanus tree I wanted since there are a variety of types.

Characteristics- really tall tree (Wiki says 30-50 metres), with pretty huge leaves too (look at them compared to the car). A somewhat uniform branch length starting fairly low on the trunk. 


Here is the default preset Platanus tree... wow doesn't look much of anything like the refs.


After tweaking the branch and bough lengths, convexity, leaf density and scale, and B3 density I ended up with this. Not really that many parameters had to be changed! 

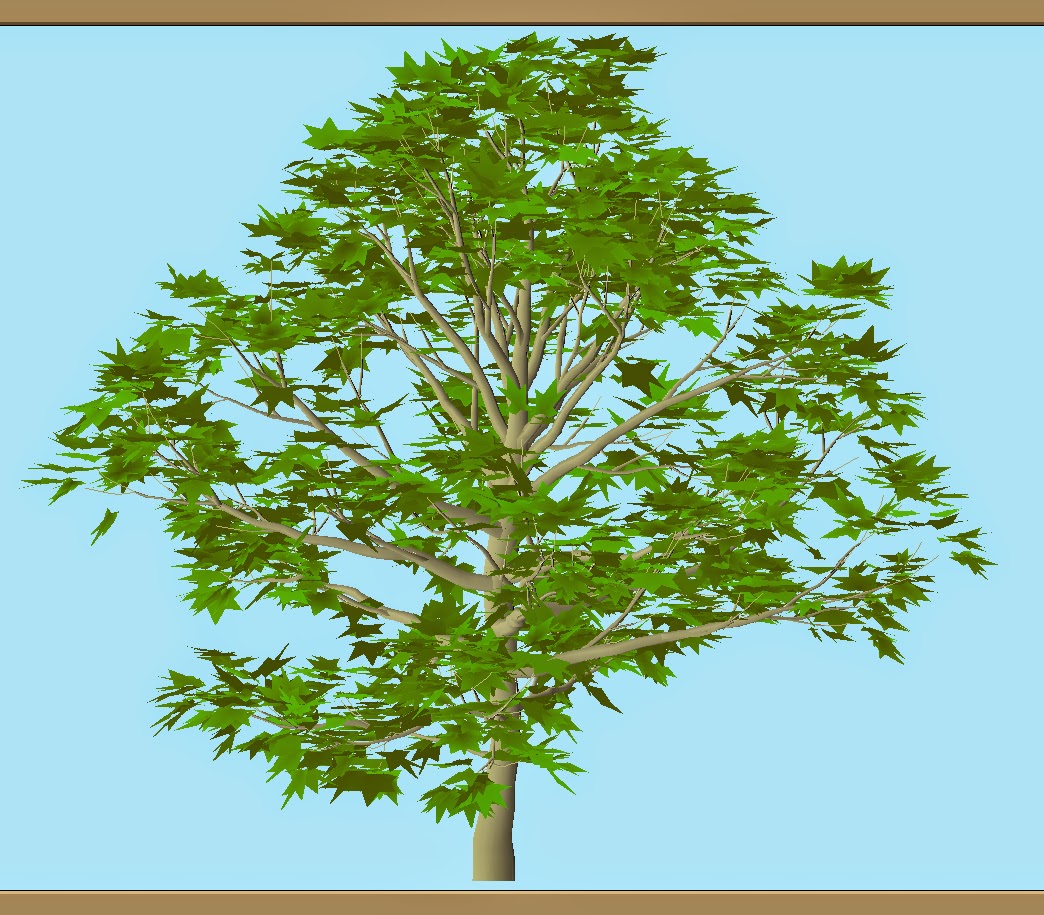
My last thing to decide was whether to have it sky sensitive or not. This is a parameter under Phyllotaxy on the Leaf submenu. Sky sensitive means that the leaves are oriented to face the sun, a characteristic many plants have. Looking at some of the references I couldn't really determine if they were or not, so I left it up to which look I liked better.
Example of sky sensitive tree (Acer saccharum):


Friday, April 25, 2014

Debugging ONYX Leaf Shaders


So there was something off that I noticed when I was rendering my trees for my Spirited Away tunnel scene... the leaves were either rendering as cards or just looked plain weird.


The error was hard to notice sometimes as leaves in shadow looked okay, as you see here.


But now, see how the leaves that are being directly illuminated look strange?
At first I thought the cutout opacity wasn't working or maybe that it had something to do with the specular maps, but tweaking and changing those didn't change anything.


Zooming in you can see just how bad it is. What the heck is happening?!

After about 20 minutes or so of trial and error changing around nodes in my leaf shader and lots of keyboard banging, I stripped my scene and just put the trees I was instancing side by side and rendered them one at a time. The first tree had the same strange shader error, but the second one didn't. What the? But then I realized that those two trees had different leaf types!


The leaves on the left look bad, but on the right look good. I realized it was because of the way the leaves were split up from ONYX. Notice how the left is just a single square triangulated, while the right is 4 squares triangulated. So there in lies the problem and the solution.

SOLUTION:


In ONYX, when you export the tree as OBJ click Plates to edit the leaves. 


This was the default way I exported the leaves, with a resolution of 0 to save on the polycount. Note that with it set to 0, the count is a comfy 88k polys. (Also note that you should change p-objects to 1 so the UVs aren't all wacky)


Change the resolution to 1. This REALLY ups the polycount to 244k, but honestly not that bad for instanced trees that have correct leaf shading. 

Now to go back to ONYX and re-export all my trees with correct leaves... Hope this helps someone else!

Wednesday, April 23, 2014

Storyboard Testing


We've begun rough storyboarding phase for senior concepts, and I was getting unusually frustrated at drawing with pencil and paper, so I tried going digital. I'm using a technique that I learned at Pixar, one that Dice Tsutsumi uses for his quick colorscripting- basically block out background areas and then use the lasso tool to roughly draw figures and shapes and color in, which creates really crisp, easy to read edges. I found it works great and I'm going to use this technique for my whole storyboard.


Monday, April 21, 2014

Spirited Away Tunnel: Foliage Instancing


I implemented a particle instancer in Maya to distribute the grass, I like how automated it made populating the hill areas, but it looks pretty crappy as it falls off on the path.

The path was drawn out with Maya's 3D paint tool, I just painted black on the areas where I wanted grass and then plugged that texture into the instancer node! Really handy. I think I'm going to use custom painting to do the areas of grass falling off to the road.


Render Time without trees and hand placed shrubs = 3:13 at 960 x 640


Render Time with trees and shrubs = 6:58 at 960 x 640

So obviously the trees contribute quite a lot to the render times, I'm wondering just how much render time will be saved with proxies?

Sunday, April 20, 2014

Spirited Away: Tunnel WIP


I've been so flip floppy on my Spirited Away projects, I did some work on the tunnel scene today.

Just a quick post, I'm 85% finished with the modelling  and had fun playing around in PS to make textures.
The trees are from Onyx and the bushes are PaintFX presets that have been tweaked to hell and back to look decent. This time I'm rendering with Mental Ray Physical Sun & Sky since Arnold wasn't liking the opacity maps on my leaves... hm.

Render time was 5:44 for 960 x 540, not bad! I expect vast improvements on render time once I turn the foliage into proxies.


With grass:


The grass looks pretty crappy, I applied it just by painting directly on the ground, but I am looking to using particle instancing to distribute it more naturally.

UPDATE:

Here is a preliminary look at some bush instancing. 4 different bush types that are instanced to fill the background, I will hand-place extreme foreground foliage. Render time was about 4:30 at 960 x 540 without optimization (though render time increases the closer the camera gets to the foliage).


What is frustrating is that some of the bushes are floating above the ground plane even though the pivot of the bush is at the bottom of the trunk, its at the origin, and transforms frozen... hmmmm.

Some of the textures:


Thursday, April 17, 2014

Facial Modelling: Ashitaka


So I really wanted to practice my facial modelling skills before starting on the face/head for my original character for ITGM 333. One of my all-time favorite films is Hayao Miyazaki's もののけ姫 (Princess Mononoke), and my favorite Ghibli character has to be Prince Ashitaka.

Translating the iconic Ghibli style to 3D is something I thought would be a challenge, so I decided to model a bust of Ashitaka.

I started out with some really quick and simple orthographic sketches to get me started:


Here is what I have so far. Getting the face shape and eyes right have proved to be the most difficult parts!       


The hood, hair, and brows are just placeholders for now to help visualize the character better. I'm rendering a lit turntable now to evaluate where needs tweaks. 

I'm now going back and readdressing the jawline and cheek areas per some great crits by my amazing character modeller friend :)

Turntable render on Vimeo


Sunday, April 13, 2014

Road to Somewhere: Look dev


So I've been exploring doing look development type things lately and really wanted to create a piece for my reel outside class that would be challenging and also showcase my skills.

I absolutely love Hayao Miyazaki's 2001 film 千と千尋の神隠し (Spirited Away). I saw the film in 2002, just before I turned 10 years old, the same age as Chihiro. Because we were the same age and also looked alike I became more emotionally attached to the film and felt like I could be in that story. I remember not understanding the Japanese spirits and customs that were prevalent in the film and I think that is really what kick-started my strong interest in the Japanese culture, language, and folklore.

Looking through the artbook I have of the film I was really drawn to the background art of the opening sequence (plus every time I hear 「あの夏へ」 I get so nostalgic)


I first started working on blocking out this scene, the pivotal moment when the family enters the spirit area as designated by the old torii gate and stone shrines.


I also like the look of the iconic tunnel from the point of no return for the Ogino family, so I started modelling the building.


I started getting restless modelling the tunnel and wanted to do something else, so I started blocking out the stairs scene, with the thought in mind that I could add a water sim to it from the frog statue's mouth.


I was having a hard time figuring out how to model the rest of the building that is obscured by the stairs so I went and watched my copy of the film and saw this scene that revealed more of the buildings. But this added a complication- there are discrepancies between both paintings of the buildings: the screen doors are different, the railings are different, there is a side roof on one but not the other, the yellow building has a different top shape and one window instead of two. Because of these differences I picked and chose which ones I wanted to go with instead of just 100% copying the daytime painting.


WIP of the modelling and (almost) final grass.


Here is a gif showing my grass progress. I used paint FX grass that was tweaked to look more natural and the djPFXUVs script to add variety to the shaders.


Mudboxing the stairs!

Saturday, April 12, 2014

Character Modelling!


This quarter I'm also taking an ITGM class, ITGM 333: Sculptural Texturing for Games. The fancy title is a little confusing, but its basically a character modelling class. We're spending 10 weeks designing, modelling, and shading one character that we create. The concept process took quite a while, 3 weeks!! But I think its important to be able to really get into a character that you like and want to bring to life.

We were supposed to start with silhouettes exploring three key words, but I already had a character in mind before that. I was dead set on doing a hybrid of bird and person, but not just a girl with angel wings slapped on the back. I wanted it to be plausible enough and not just do arbitrary things and justify it "because fantasy."


This is the first sketch that I did that really hit home with what I was looking for in my character. I did a lot of extensive research in look development for how she should look. My main bird for inspiration is the golden eagle, especially after seeing a documentary about a group of people in Kazakhstan that have lifelong relationships with a golden eagle to use for hunting. 

After doing this I started looking into birds and how they fly and their general physical biology. I knew I wanted my character to have a face that had a wide nasal bridge and very large eyes to mirror a bird's head. I read that an eagle's eyes fill up most of the skull, not leaving much room for the brain. I knew I wanted my characters to be intelligent, so in the model I will elongate the back of the skull to make room for a large human brain.

I like going very in depth with my creations, so I created a whole background for this race of people:

I call them the Tenger people, the word is made up but is based on the Japanese character 天 ten meaning heaven, sky, and imperial. They live on floating outcroppings of rock high in the atmosphere, a la Laputa, Avatar, and Legend of Zelda: Skyward Sword. Below the planet is a vast ocean that has an abundant supply of fish, which is the people's main food source. There are no trees or wood in this environment they live in, only rock, grasses, vines, and shrubbery. I would say the biome would be most similar to xeric shrubland and grassland steppes.

These people's society is scholarly, with a focus on science, math, and logic. Inspiration was from ancient Rome and the Islamic Golden Age, where scientists and scholars were important members of society. They are obsessed with astronomy and the movement of the stars and also history of how their people got to where they are. Their history scrolls only go back so far, with the origin of the people being a mystery.

I love going into more details in my mind, things like if they don't have trees then they have a plant from which they make paper, like papyrus or rice.

The hands and the feet would have the fingers and toes end in talons that could be used to grip onto surfaces when perching. I added an extra toe to the back of the ankle that is similar to an eagle's feet, which would allow for grabbing things with the feet while in flight.

Her name is still tentative, but I like the sound of "Serak." Its based on the Kazakh name "Serik" which means "support." It is androgynous sounding and I feel fits her look.


For fun I did some expressions that explore her personality, I like the idea of her being very curious and tomboyish, similar to the personality of the character Arya Stark from A Song of Ice and Fire.

Final costume, hair, and face design. My thoughts on the costume were after thinking about what this race of people would viably wear. Going back to the idea of ancient Rome and Islamic cultures, I wanted to play with very drapey, layered fabrics made of linen and cotton. I like the idea of these long ribbons that flow from the back that would look like a kite when they fly. 


And exploration of how the pants could tie to make space for the tail. 


Looking at the wingspan- I made the arms much longer than a human's arms to make the wings large and look like they could plausibly fly.


For Serak's particular background, I thought of her as the daughter of a blue-collar family, perhaps stone carvers or fishers. Despite not having a formal education, she displayed a high level of intelligence and interest in science and history. Because of this she is sent to the capital city to be an apprentice to a scholar and learn under him. These sketches are exploring how her personality might clash with such work.


Final model sheet ready for modelling!

Wednesday, April 9, 2014

Concept: Mood Boards


New blog! This is my first post.

For Concept class we had to create mood boards based on our 3 favorite stories that we came up with. I got really into making the mood boards and actually made several for 2 of the stories. All story titles are tentative, just had to name them for now.

1. The price of forever.

This story is about a woman who lives in a house deep in a forest, isolated from society. She ages from child to old woman in one day. In that day, she tends obsessively to a plant in her house that before midnight bears a singular fruit and seed. The fruit must be eaten and the seed replanted, wherein the woman wakes up the next day a child again. Its a story about the fear of death, and immortality and the price you pay to keep it.


The character would age throughout the day, so at least 3 character models would be necessary- child, adult, old woman. I am very drawn to the look of female Ghibli characters, so I would want to adapt that style for this if I went with it. 


The house she lives in is inspired by fantasy-type architecture and color palettes. I especially like the look of the cottage from Sleeping Beauty and Kiki's house from Majou no Tankyuubin


The magical plant would be a combination of several existing plants that have meanings that coincide with rebirth. The fruit would resemble a peach, as the peach of immortality is a famous icon in Chinese culture.


2. escapism
This story is much more personal to me, as I developed it based on my experiences living in New York City for 3 months and riding the subway more than twice daily for up to an hour each trip. It would be a looser story, more about the concept of escapism and fantasy vs. reality. I would escape the monotony and grind of every day life (and commute) through music. Without my headphones and music player, I would not have survived! 

I decided that I would want to set this piece in a place like Tokyo. Visually, the homogeneity and conformity of large cities full of strangers has a lot more impact when done with Tokyo in mind. Not only that but I have studied Japanese for over 5 years and find it close to heart. I also wanted to explore the fact that Japan is such a conformed society, yet its people produce some of the most amazing creative and technological works I've ever seen.


The look of the sailor uniform is one that I've always loved. It also reinforces the homogeny theme by making all the young students wear matching clothing to look the same. I'm also very inspired by the works of Jun from pixiv.net, who painted surrealistic pictures of school girls.


The dream sequence will probably change as I go along, but I want to stick with the idea of firefly-like stars flooding the train car. I also like the idea of a huge bioluminescent whale swimming by.

3. Rainy day.

This one was inspired by a photo I saw shared on a blog, the one on the far left. The story isn't really that fleshed out, the images are more just evoking an atmospheric mood.